
Using the IML-RESI is very easy, but how do you actually use the device systematically during the detailed examination on the tree?
This tutorial gives you initial impulses on site and instructions on how to proceed independently. Which basic data should be collected? Where should you drill, when there is a visible damage? What else should be considered?
Inhalt
Requirements
In order In order to be able to work with the RESI in the area of in-depth investigations, basic knowledge of wood structure, differences in tree species and types of rot should be available. It is also important to find the right starting points for the respective damage symptoms on the trunk or in the crown. This is especially difficult for beginners, which is why this tutorial shows “first steps”.
Basic data
The most important work is actually done before the RESI is used. Only with the correct recording of tree height, trunk circumference/trunk diameter, documentation of the symptoms of damage, location of the damage, etc. can lead to a satisfying result.
Use on the tree
Classically in tree diagnostics, there are harmful features on the tree (e.g. hollow sound, mushroom fruit bodies, etc.) which make a final assessment of the tree in the regular tree control not possible and thus require a detailed examination.
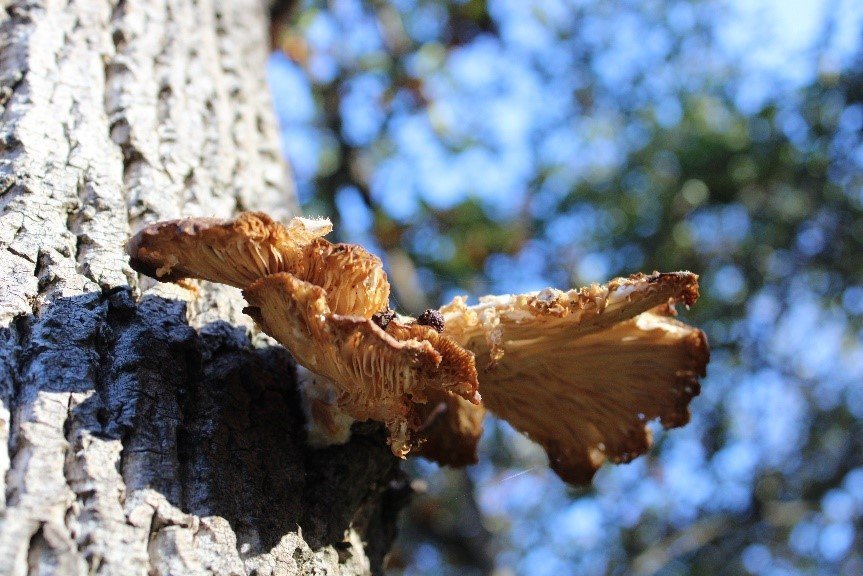
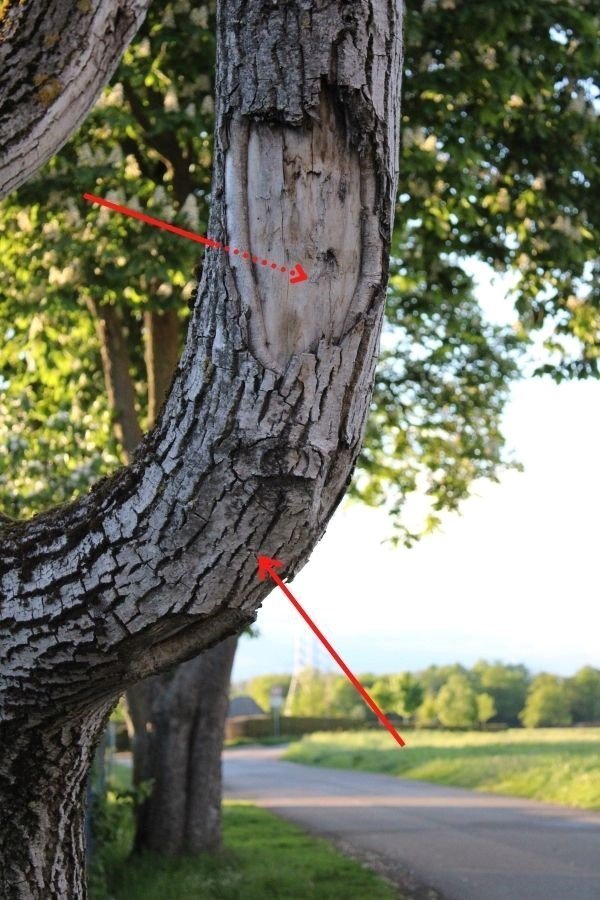
The damage should first be verified on the back of its occurrence on the tree.
Depending on the course of the curve, the extent of the damage, the progress of the rot, further measurements on the tree are necessary in order to obtain a picture of the expansion inside the trunk. In addition, it may also be necessary to determine the remaining wall below the damage in order to assess the possible risk of breakage.
Addition of object data
Once all the relevant points on the tree have been examined in the respective levels, the data from the drilling resistance measurements can be evaluated on the PC.
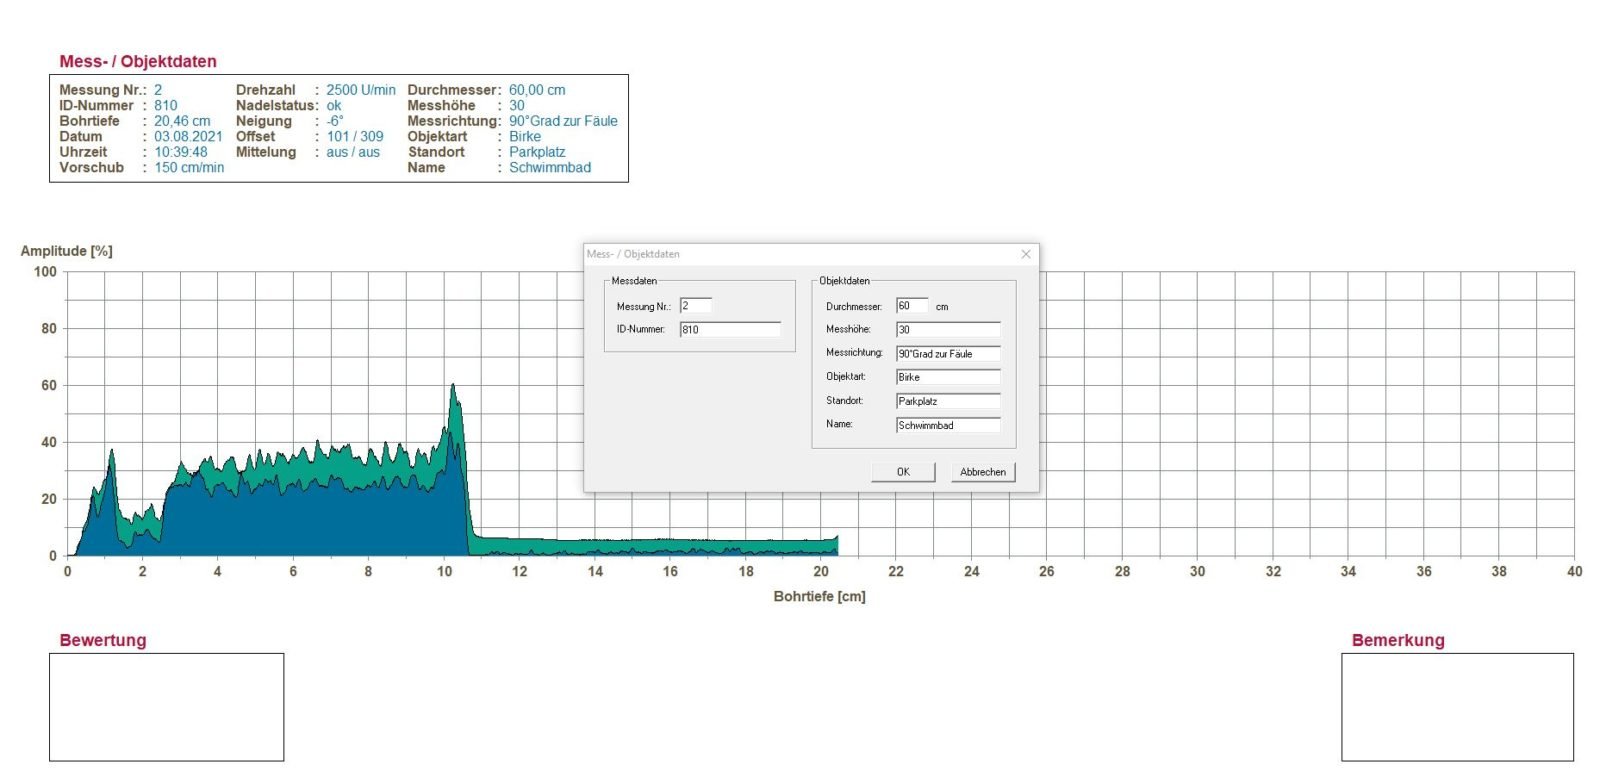
Some of the basic data from the on-site surveys are entered here. Tree number, measuring height and object type as an example. The user can weigh up individual characteristics here.
Whether the measurement direction indicates the cardinal point on site or, as in our example, the degree information in relation to the damaged area, is left to individual preferences.
Evaluation of measurement data
The next step is to evaluate the drilling curve.
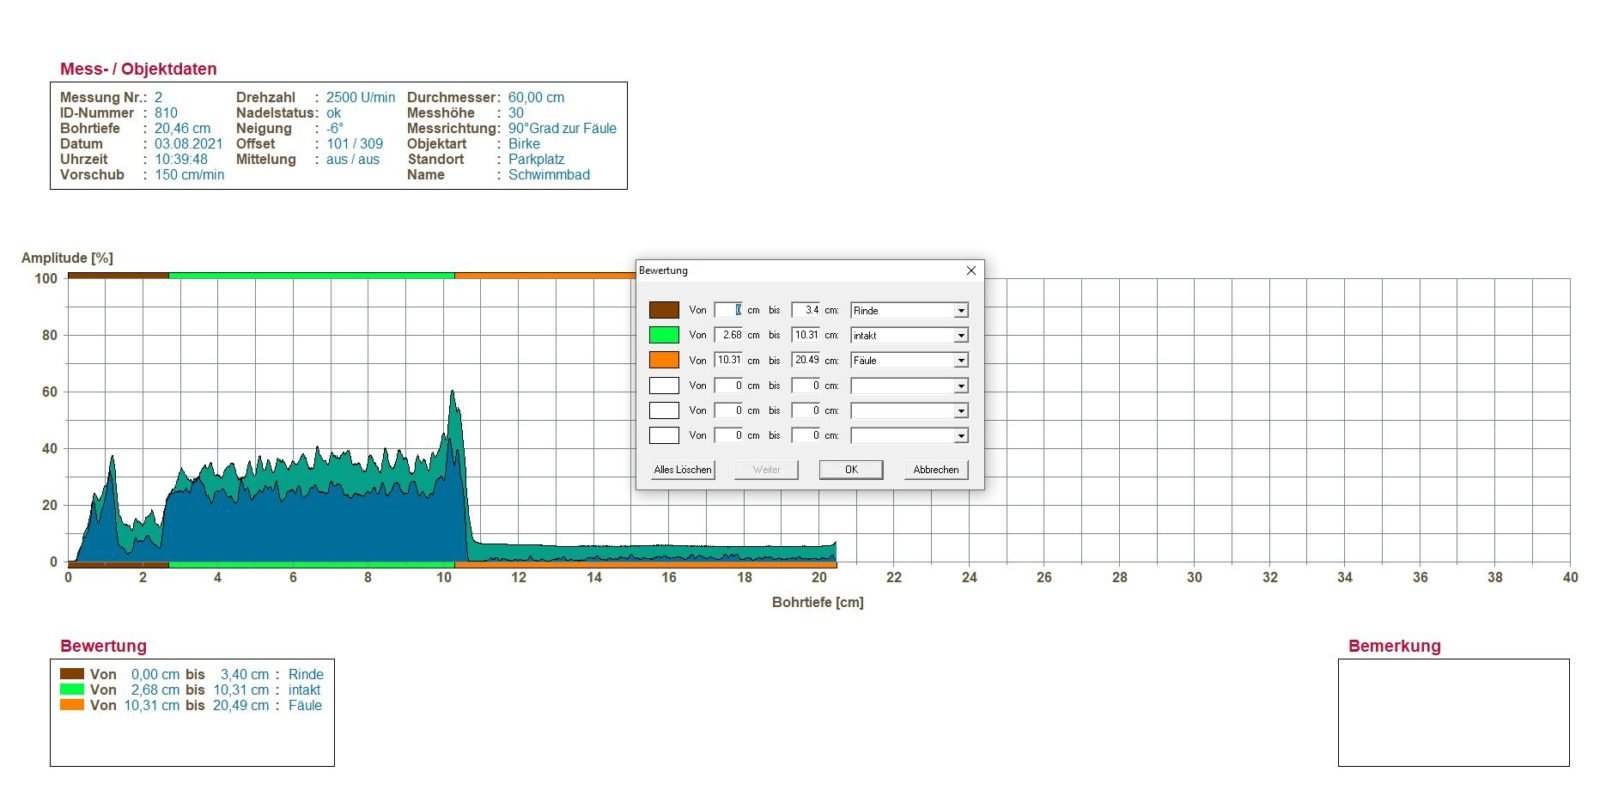
The thickness of the bark is specific to the tree species and is indicated first.
The allocation takes place via the selection arrow and the previously set evaluation criteria.
Here, too, the individual areas within the trunk cross-section can be freely named.
Results
The final step in the evaluation is the technical classification of the results in common findings from materials science, arboristics and current studies.
For more insights into working with our PD series and our other products, it is always advisable to take a look at our Instagram and Facebook page, where practical examples are stored at irregular intervals.
